
Using GIT with BitBucket (or any other remote repository)

It is quite simple. Follow this link to install and setup GIT: 


Do not create a new repository in BitBucket, as we already have couple of repositories. Do your operations on any of the two existing repositories.

How to use the GIT UI:

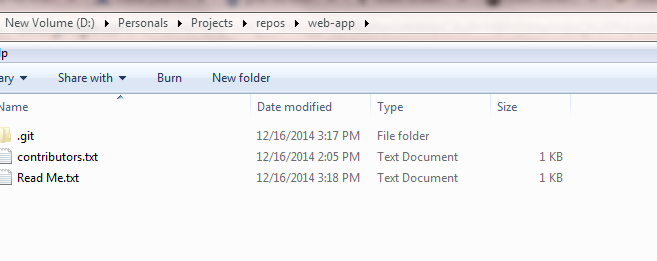
After cloning ‘web-app’ repository I get the ‘web-app’ folder on my machine. Initially it is empty since there is no source code. I added a file ‘Read Me.txt’


If I right-click on the file and select ‘Git GUI’. It will prompt me to select between ‘Creating a new repository’, ‘Importing/Cloning a new repository’, ‘Opening an existing repository’.

Since we already have a repository created, select ‘Opening an existing repository’. Give the directory of ‘web-app’ folder (the folder which contains .git file).

In GIT, checkin is a 2-step process: We need to add file to staging area and then add to commit.


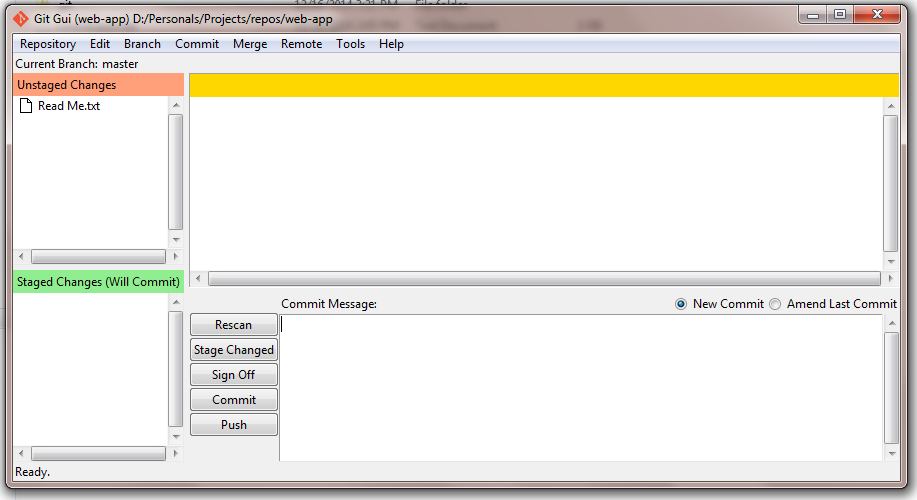
Select the ‘Read Me.txt’:

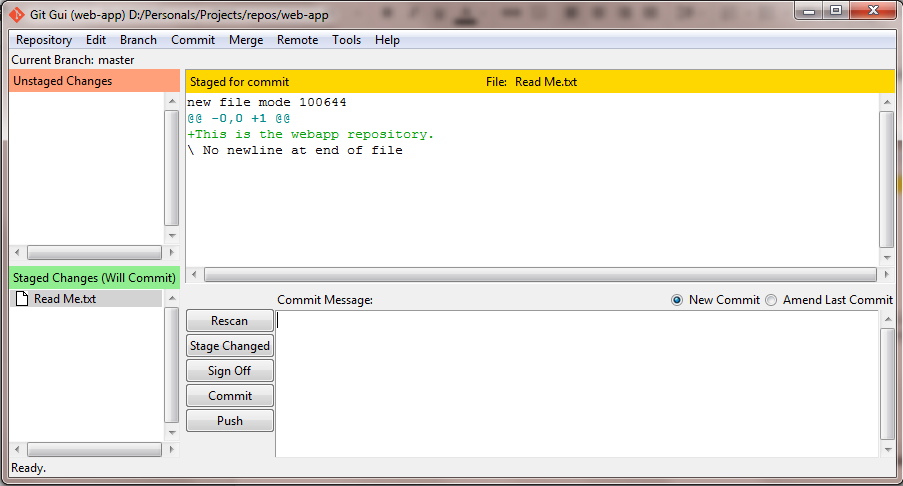
Select Commit->Stage to Commit:


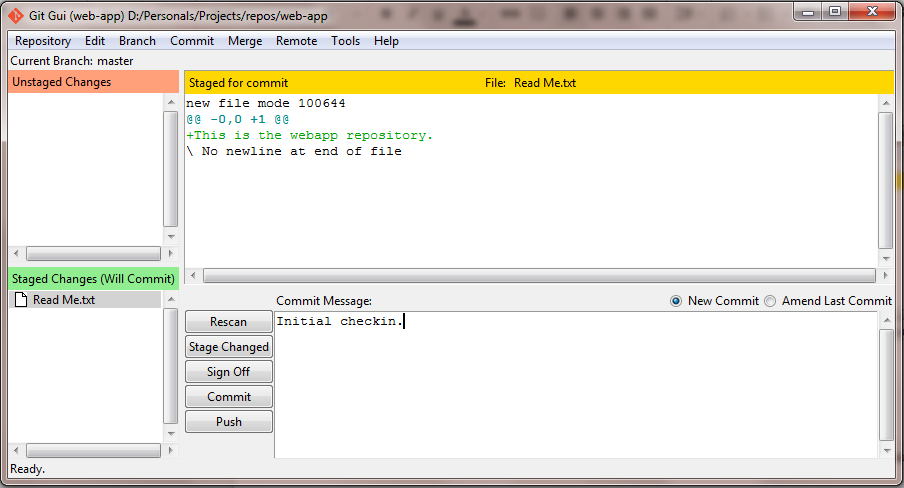
Give a commit message:


This will commit the file to local repository. But you have to ensure that these changes are pushed to our BitBucket repository also.

Click on ‘Push’. New popup will open showing all the branches in the remote repository. Currently we have only one branch: master.


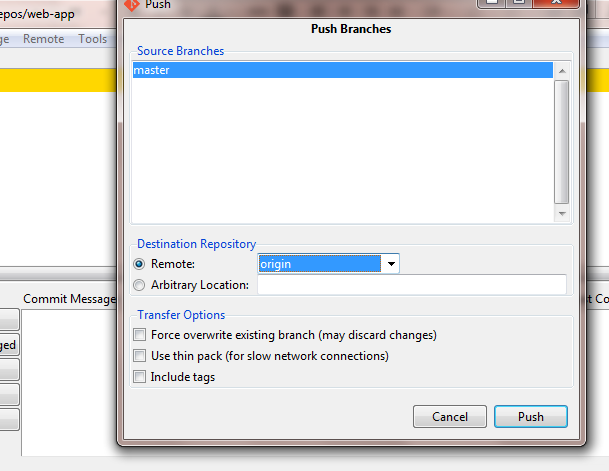
Click on Push. It will ask for your BitBucket account password. If everything goes fine, you should get success message.

Go to BitBucket repository. Click on Commit or Source and you should see new file added/updated.

How to Remove a checked in file:

I don’t know how to do this using GIT GUI. So if you have to do it, you can use GIT bash.

Open GIT bash.
Navigate to file path.
Give these commands:

git rm file1.txt
git commit -m "remove file1.txt"
git push -u origin master
This will remove the file from local as well as remote repository.

Comments

Popular posts from this blog

How to upload to Google Cloud Storage buckets using CURL

Signed URLs are pretty nifty feature given by Google Cloud Platform to let anyone access your cloud storage (bucket or any file in the bucket) without need to sign in. Official documentation gives step by step details as to how to read/write to the bucket using gsutil or through a program. This article will tell you how to upload a file to the bucket using curl so that any client which doesn't have cloud SDK installed can do this using a simple script. This command creates a signed PUT URL for your bucket. gsutil signurl -c 'text/plain' -m PUT serviceAccount.json gs://test_bucket_location Here is my URL: https://storage.googleapis.com/test_sl?GoogleAccessId=my-project-id@appspot.gserviceaccount.com&Expires=1490266627&Signature=UfKBNHWtjLKSBEcUQUKDeQtSQV6YCleE9hGG%2BCxVEjDOmkDxwkC%2BPtEg63pjDBHyKhVOnhspP1%2FAVSr%2B%2Fty8Ps7MSQ0lM2YHkbPeqjTiUcAfsbdcuXUMbe3p8FysRUFMe2dSikehBJWtbYtjb%2BNCw3L09c7fLFyAoJafIcnoIz7iJGP%2Br6gAUkSnZXgbVjr6wjN%2FIaudXIqA

Running Apache Beam pipeline using Spark Runner on a local standalone Spark Cluster

The best thing about Apache Beam ( B atch + Str eam ) is that multiple runners can be plugged in and same pipeline can be run using Spark, Flink or Google Cloud Dataflow. If you are a beginner like me and want to run a simple pipeline using Spark Runner then whole setup may be tad daunting. Start with Beam's WordCount examples  which help you quickstart with running pipelines using different types of runners. There are code snippets for running the same pipeline using different types of runners but here the code is running on your local system using Spark libraries which is good for testing and debugging pipeline. If you want to run the pipeline on a Spark cluster you need to do a little more work! Let's start by setting up a simple standalone single-node cluster on our local machine. Extending the cluster is as easy as running a command on another machine, which you want to add to cluster. Start with the obvious: install spark on your machine! (Remember to have Java a

java.lang.IllegalArgumentException: Malformed \uxxxx encoding

I was getting this exception during build while running ant. Googling didn't help much and I was flummoxed because the same code was running fine till now. My code reads a text file and does some operations on the basis of values read. It was only when I saw the text files I understood the error. I had copied the text in wordpad and saved it as .txt file. Wordpad had put lot of formatting information before and after the content. Also there was "\par" after every line, which was giving this error. So moral of the story: if you get this exception check your properties file (or any other file that your code might be reading.)